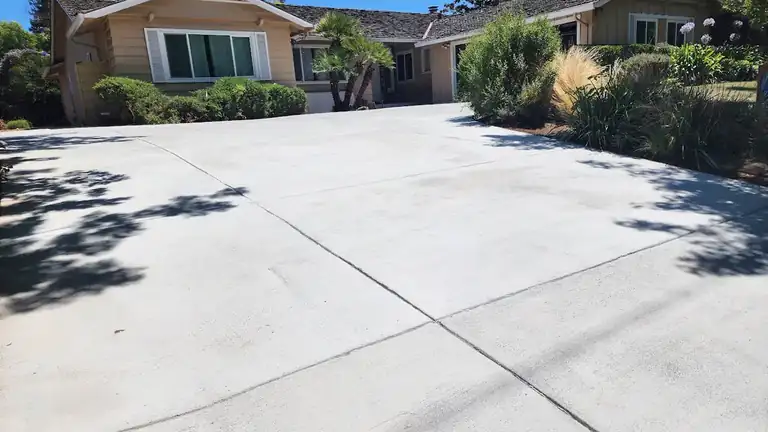
Concrete begins shrinking the moment water evaporates from the mix and the hydration process converts liquid paste into hardened calcium silicate hydrate. This volume loss inevitably produces internal tensile stress that exceeds the early tensile capacity of the material, making cracking unavoidable in any unmanaged pour. Control joints in concrete, formally classified as contraction joints, do not prevent shrinkage; instead, they establish predetermined weakened planes that dictate exactly where the slab cracks below the surface, preserving structural integrity and a clean architectural finish.
According to We Love Paving’s field operations team (CSLB Licensed #1049649, C12 Earthwork and Paving), improper joint layout remains one of the primary catalysts for early pavement failure in industrial parks, distribution centers, and commercial retail facilities across California. When commercial slabs are installed without strict adherence to depth ratios, timing windows, and subgrade mechanics, uncontrolled jagged fissures compromise wheel load transfer and expose the base material to moisture infiltration. Proper execution transforms an unpredictable material failure into a calculated, maintainable joint system that withstands decades of vehicular demand.
Why Concrete Slabs Require Control Joints to Manage Inevitable Shrinkage
Concrete shrinks approximately 0.5 to 0.8 inches per 100 linear feet as free mix water evaporates and hydration proceeds, generating internal tensile stresses that the material cannot resist without cracking. Control joints create a localized reduction in slab thickness that acts as an engineered stress relief mechanism, ensuring that the inevitable fracture forms along a straight, concealed path beneath an intentional surface groove rather than wandering randomly across the pavement.
In commercial environments throughout California, failing to establish these weakened planes leads to uncontrolled diagonal and mid-panel tearing that destroys surface aesthetics and wheel paths. In areas with highly plastic expansive clays such as parts of Santa Clara, Contra Costa, and Alameda counties subgrade moisture fluctuations compound the drying shrinkage of concrete. Slabs that lack properly functioning contraction joints experience uneven slab curling, edge lift, and eventual structural breakup under daily commercial traffic. Integrating precise joints during initial commercial concrete paving installations ensures that hydration shrinkage and subgrade friction do not degrade the structural investment.
The engineering principle relies on aggregate interlock beneath the cut, as outlined in American Concrete Institute guidelines ACI 224.1R and ACI 302.1R. When the saw cut scores the upper cross-section of the slab, the tensile strain concentrates directly beneath the incision. As the concrete contracts during the initial drying cycle, a micro-crack propagates downward through the remaining slab thickness. The rough, fractured faces of the coarse aggregate remain intermeshed beneath the cut, allowing the slab to transfer vertical shear forces from axle loads across the joint while freely accommodating horizontal volumetric contraction.
Standard Depth and Spacing Calculations for Concrete Control Joints
The cut depth for a standard concrete control joint must equal a minimum of one-fourth of the total slab thickness (T/4, or 25%), while joint spacing must not exceed 24 to 30 times the slab thickness in inches expressed in feet. For an unreinforced commercial exterior slab with a 6-inch thickness, the minimum cut depth is exactly 1.5 inches, and the spacing between joints must remain between 12 and 15 feet in both directions to prevent intermediate shrinkage cracks.
Dimensional geometry dictates joint performance as much as linear spacing. Following Portland Cement Association (PCA) and ACI 360R recommendations, panels should be designed as close to square as field geometry allows, with the length-to-width aspect ratio never exceeding 1.25:1 (with an absolute structural limit of 1.5:1). Long, rectangular panels concentrate longitudinal tensile stress along their midsection, producing transverse cracking regardless of depth compliance. Furthermore, re-entrant corners around columns, drainage basins, and building corners create stress concentrations that require diagonal or radial relief joints extending directly from the corner apex to isolate the re-entrant angle.
Commercial paving projects require strict dimensional verification before saw blades touch the curing slab. The following parameters establish baseline standards for common commercial slab thicknesses:
Control Joint Calculator
Adjust the slab thickness to visualize the required saw-cut depth and control joint spacing.
1.50″
12.0′ – 15.0′
Design parameters compliant with ACI 302.1R & ACI 360R standards.
Deviating from these dimensional rules carries severe consequences for commercial property managers. A cut that achieves only 15% or 20% of slab depth fails to create a sufficient stress concentration, allowing cracks to bypass the cut line and develop parallel or diagonal to the saw line. Conversely, cutting deeper than one-third of the slab thickness needlessly destroys the aggregate interlock mechanism, reducing shear load transfer capability and risking premature joint faulting under heavy logistics traffic.
Timing the Cut: Early-Entry vs. Conventional Saw-Cutting Windows.
The precise window for saw-cutting concrete control joints opens as soon as the concrete surface can support worker and equipment weight without marking and closes before internal tensile stresses exceed the early tensile strength of the concrete. For early-entry dry-cut saws, cutting must take place between 1 and 4 hours after final finishing; for conventional wet diamond saws, the operational window opens between 4 and 12 hours after placement, rarely extending beyond 24 hours under mild atmospheric conditions.
Timing saw cuts requires continuous monitoring of ambient temperature, concrete mix temperature, and relative humidity. Cutting too early results in raveling a condition where the spinning saw blade dislodges coarse aggregate particles from the unhardened cement matrix, creating rough, spalled, and structurally compromised joint shoulders. Cutting too late, after the concrete has passed its peak hydration temperature and begun cooling and contracting, results in uncontrolled sub-surface cracking that occurs ahead of or adjacent to the saw blade path, rendering the mechanical joint useless.
Field crews evaluate readiness using the scratch and edge test: dragging a steel blade across the surface should produce a slight mark without gouging, and the initial saw rotation must yield crisp, sharp edges without tearing the matrix. In California's dry summer months, rapid evaporation accelerated by coastal winds significantly narrows this cutting window. Operations teams must maintain backup saw equipment and multiple operators on site to complete all planned layout cuts before evening temperature drops initiate the primary contraction cycle of the slab.
Control Joints vs. Expansion and Isolation Joints: Functional Differences
Control joints in concrete accommodate horizontal drying shrinkage by guiding micro-cracks beneath an engineered groove, whereas isolation and expansion joints accommodate multi-directional movement and completely separate the slab from surrounding rigid structures or adjacent pavement zones. While a control joint retains aggregate contact and continuous load transfer through the base of the slab, isolation and expansion joints utilize a full-depth physical separation with compressible filler material to prevent compressive crushing and reflective cracking.
Confusing these joint types leads to premature slab destruction in commercial facilities. Isolation joints extend completely through the full depth of the concrete, isolating footings, building columns, retaining walls, and utility manholes so that differential vertical settlement or structural vibrations do not crack the floor slab. Expansion joints, also formed as full-depth separations, incorporate compressible closed-cell foam or asphalt-impregnated fiberboard to absorb thermal expansion during peak ambient heat, preventing adjacent slab panels from buckling upward under compressive force.
Understanding each types of concrete and their technical boundaries ensures correct specification in the field:
| Joint Type | Primary Purpose | Depth of Cut / Separation | Load Transfer Mechanism | Typical Filler / Sealant |
|---|---|---|---|---|
|
Control (Contraction)
|
Relieve drying shrinkage and thermal contraction stresses | 1/4 to 1/3 of slab thickness (T/4) | Aggregate interlock (or smooth dowels if specified) | Elastomeric sealant (exterior) or semi-rigid filler (interior) |
|
Isolation
|
Eliminate restraint from walls, footings, and structural columns | Full depth (100% of slab thickness) | None (complete physical isolation) | Preformed compressible filler with surface sealant |
|
Expansion
|
Absorb thermal expansion and prevent compressive blowups | Full depth (100% of slab thickness) | Smooth slip dowels with expansion caps | Compressible fiberboard or closed-cell foam with sealant |
Commercial Joint Protection: Sealants, Heavy Wheel Loads, and Subgrade Stability
Exterior commercial pavements require elastomeric joint sealants meeting ASTM C920 standards to block moisture and debris from reaching the underlying subgrade, whereas interior industrial slabs subject to hard-wheeled forklifts require semi-rigid epoxy or polyurea joint fillers that physically support the joint shoulders against impact. Unsealed exterior joints permit rainwater to penetrate the subbase, softening load-bearing soils and triggering subgrade pumping, while unfilled interior joints suffer devastating shoulder spalling under concentrated wheel loads.
In California commercial properties, protecting the subgrade from surface run-off is critical to slab survival. When unsealed joints allow stormwater to pool beneath exterior pavements, expansive clay subgrades swell non-uniformly, generating heave beneath joints and settlement beneath panel centers. Over repeated wet and dry seasons, this differential soil movement fractures panels, destabilizes truck aprons, and degrades base compaction. High-performance polyurethane or silicone sealants installed over closed-cell polyethylene backer rods form an elastic barrier that expands and contracts with seasonal temperature shifts without rupturing adhesion.
In high-traffic loading docks, warehousing facilities, and distribution yards, dynamic point loads from hard polyurethane or solid steel forklift wheels crush unarmored joint edges. Once micro-spalling begins, impact forces compound rapidly, creating potholes and safety hazards that disrupt logistics. If your facility already exhibits broken edges, joint faulting, or sealant failure, executing timely commercial concrete repair and joint spalling remediation restores load continuity and arrests pavement deterioration before panel replacement becomes mandatory.