How Long Does Asphalt Take to Dry? (2026 Guide)

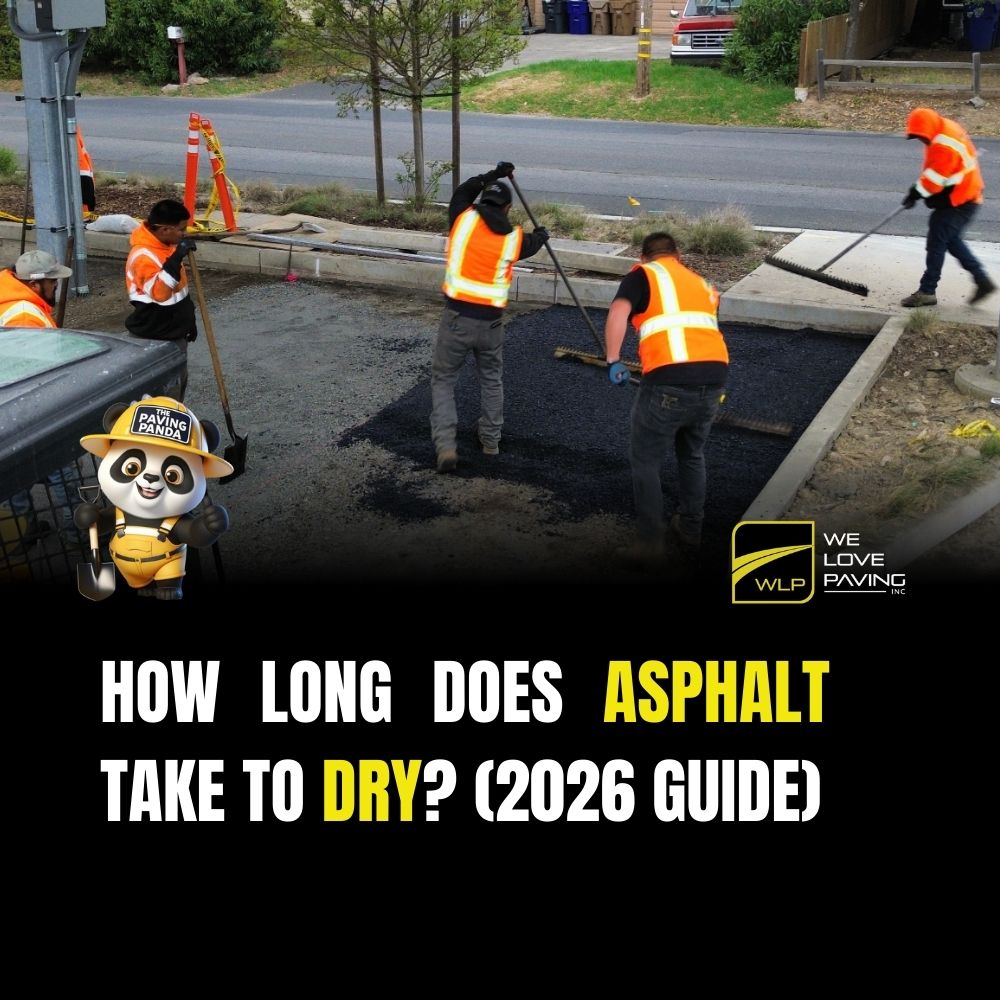
If you’re planning an asphalt project, one of the most common questions is: “How long does asphalt take to dry?”

Here’s the short answer:

  • Initial dry time: 2–4 hours

  • Ready for light traffic: 24 hours

  • Ready for heavy vehicles: 48–72 hours

  • Full cure: 30 days

But drying time depends heavily on weather, thickness, and how the surface will be used. Below is the full breakdown so you can plan your project with zero guesswork.


Drying vs. Curing: What’s the Difference?

Many people confuse drying and curing, but they’re not the same:

Drying (Top Surface Dryness)

This is when the surface becomes firm enough to walk on without leaving marks.
Time: 2–4 hours

Curing (Full Hardening)

This is when the asphalt reaches its full strength and can handle heavy loads.
Time: 24–72 hours for practical use
Up to 30 days for full chemical cure

Understanding this difference is crucial—especially for commercial parking lots and high-traffic properties.


How Weather Affects Drying Time

Weather is the biggest factor in asphalt drying.

Temperature

  • Hot weather (75°F–95°F): Fastest curing

  • Cold weather (below 60°F): Slows the process significantly

  • Very hot weather: Can cause the surface to stay soft longer

Humidity

High humidity delays drying because moisture stays trapped in the air.

Sun Exposure

  • Direct sunlight: Faster drying

  • Shade: Slower and uneven drying

Wind

A light breeze helps release moisture and speeds up drying.


How Asphalt Thickness Changes Drying Time

Not all asphalt jobs are the same thickness. More material = more time.

  • 1.5″ lift: Dries faster (common for overlays)

  • 2″–3″ lifts: Slower (common for new construction)

  • Multiple lifts: Each layer needs time to stabilize

Heavier parking lots or commercial drive lanes always require longer curing periods.


When Can You Walk, Drive, and Park on New Asphalt?

Here are the practical guidelines:

  • Walk on it: After 2–4 hours

  • Drive cars: After 24 hours

  • Park vehicles: After 24–48 hours

  • Heavy trucks / dumpsters / equipment: After 48–72 hours

  • Line striping or sealcoating: Usually after 30 days

Parking too soon can create depressions, scarring, and long-term structural damage.


How to Make Asphalt Dry Faster

You can’t control the weather, but you can avoid delays:

  • Keep all traffic off the surface

  • Avoid watering or washing the area

  • Protect the asphalt from oil or fuel spills

  • Use proper compaction and drainage

  • Don’t apply sealcoat too early

  • Avoid sharp turns from vehicles during the first 48–72 hours


Common Mistakes That Damage Fresh Asphalt

New asphalt is strong—but still vulnerable. Avoid:

  • Parking heavy vehicles too soon

  • Spinning tires while stationary

  • Dragging kickstands, jacks, or equipment

  • Turning wheels aggressively

  • Leaking fluids (oil, diesel, coolant)

These issues cause ruts, grooves, and soft spots that shorten the pavement’s lifespan.


For Property Managers & Commercial Owners

If you manage a commercial property, drying time affects:

  • Traffic flow and tenant access

  • Business hours and customer safety

  • ADA compliance

  • Proper scheduling of line striping and signage

  • Avoiding complaints from tenants and customers

A professional contractor should help you plan closures, communicate timelines, and minimize disruption.


Final Answer: How Long Does Asphalt Take to Dry?

  • Walkable: 2–4 hours

  • Driveable: ~24 hours

  • Heavy traffic: 48–72 hours

  • Fully cured: Up to 30 days

Drying time changes based on weather, thickness, and usage—so always plan ahead.


Need Help Planning an Asphalt Project?

If you want the job done with minimal downtime, correct scheduling, and ADA-compliant results, our team can help.

👉 Request a Free Parking Lot Assessment
We’ll inspect your asphalt, drainage, traffic flow, ADA markings, and give you a clear action plan.

The Hidden ADA Violations Inside Your Path of Travel (Why Most Properties Fail Without Knowing It)

Introduction: The Most Overlooked ADA Risk Is Not the Parking Stall — It’s the Path of Travel

Most property managers spend time checking their ADA parking stalls:

  • Is the blue paint visible?

  • Is the sign at the right height?

  • Is the access aisle properly marked?

But here’s the truth:

Most ADA lawsuits don’t start at the parking stall — they start on the Path of Travel.

The Path of Travel (POT) is the pedestrian route from your ADA stall to your building entrance.
If this route has any discontinuity — even ¼ inch — the property is liable.

And the scary part?

90% of the violations on a Path of Travel cannot be seen from a car.
Tenants notice them. Lawyers notice them. Inspectors notice them.
But the PM often doesn’t… until a complaint arrives.

This blog exposes the hidden ADA violations that quietly cost properties thousands every year.


1. What Exactly Is the Path of Travel?

According to ADA + CBC guidelines, your Path of Travel must be:

  • Continuous (no gaps or disruptions)

  • Stable (no loose edges, cracks, broken areas)

  • Slip-resistant

  • Free of obstacles

  • Properly sloped (≤ 2% cross slope, ≤ 5% running slope)

  • Clearly marked where required

  • Fully connected from:
    ADA Stall → Access Aisle → Walkway → Ramp → Entrance

If any part of that chain fails, your whole property fails.


2. The 7 Hidden ADA Violations Inside Your Path of Travel

These are the issues we uncover on almost every property…
none of which the PM usually knew about.


1. Micro-Trip Hazards (¼ Inch Uplift)

The ADA threshold is tiny:

Any vertical change over ¼ inch is non-compliant.

Most PMs think:
“It’s just a small bump — not a big deal.”

But to ADA, that’s a trip hazard.
And trip hazards = lawsuits.

Common causes:

  • tree roots

  • concrete slabs shifting

  • water erosion

  • old patches

  • broken expansion joints


2. Incorrect Cross Slope on Walkways

Most PMs don’t measure walkways.
Inspectors do.

Walkways must maintain:

  • ≤ 2% cross slope

When the walkway tilts — even slightly — it becomes non-compliant.

This happens often because:

  • asphalt settles differently over time

  • concrete shifts unevenly

  • patchwork jobs create slope variations


3. Ramps That Used to Be Compliant… But Aren’t Anymore

Ramps deteriorate:

  • cracks

  • sinking edges

  • missing texture

  • washed-out transitions

  • slope increases from pavement movement

If the ramp is older than 15 years:
80% chance it is no longer compliant.


4. Missing or Non-Compliant Landings

Every ramp needs a flat landing area at the top and bottom.

Violations include:

  • landing too small

  • landing out of level

  • landing blocked by landscaping

  • landing sloping more than 2%

Landings are one of the top causes of failed inspections.


5. Damaged Detectable Warnings (Truncated Domes)

These must be:

  • secured

  • bright

  • fully intact

  • correctly sized

  • placed at the right location

Broken, faded, or missing domes = violation.


6. Obstructions Along the Walkway

The Path of Travel must be free of barriers.

Common hidden obstructions:

  • bollards too close

  • leaning signs

  • trash bins

  • overgrown landscaping

  • delivery packages

  • temporary construction debris

  • sprinkler heads sitting too high

Any obstruction reduces the minimum clear width → violation.


7. Water Drainage Issues That Create Hazards

Water pooling = one of the fastest ways to fail ADA.

Inspectors check:

  • does water collect on the walkway?

  • do slopes channel water toward the route?

  • does pooling create slippery surfaces?

Even seasonal pooling is non-compliant.


3. Why These Violations Are So Dangerous for PMs in 2026

These violations are dangerous because:

1. They are easy to document

A tenant only needs a smartphone picture.

2. They are inexpensive for lawyers to target

A single trip hazard can justify statutory penalties.

3. Inspectors now check full routes, not only stalls

Cities and CASp inspectors follow stricter guidelines.

4. Small issues turn into big repairs if ignored

A ¼ inch uplift becomes a 2-inch hazard in a year.

5. Insurance companies increasingly require ADA reports

Properties with repeated violations get flagged.


4. How Property Managers Can Fix These Issues Before 2026

This is the simple framework we use at WLP for ADA Path of Travel repair.


Step 1 — Full ADA Route Audit

We walk:

  • from the ADA stall

  • through the access aisle

  • across the walkway

  • through the ramp

  • into the entrance

We photograph and document every risk.


Step 2 — Prioritize Violations by Risk Level

High-risk:

  • trip hazards

  • broken ramps

  • standing water

  • missing detectable warnings

Medium-risk:

  • fading markings

  • minor cracks

  • minor slope issues

Low-risk:

  • cosmetic details

  • old paint

  • minor alignment issues


Step 3 — Perform Targeted Repairs

Repairs might include:

  • grinding concrete

  • asphalt patching

  • re-pouring transitions

  • rebuilding ramps

  • correcting slopes

  • installing new warnings

  • restriping accessible walkways

Every repair must meet ADA + CBC specs.


Step 4 — Document Everything With Before/After Photos

Documentation protects PMs from:

  • tenant complaints

  • legal claims

  • compliance audits

  • insurance issues


Step 5 — Schedule Annual Maintenance

Because:

  • concrete shifts

  • asphalt settles

  • paint fades

  • weather damages signage

  • roots uplift slabs

ADA is not one-time. It’s ongoing maintenance.


5. The WLP Path of Travel Compliance Program

We created a specific program to protect properties in California:

✔ Full Path of Travel Audit

✔ Slope & Level Measurements

✔ Trip Hazard Removal

✔ Ramp & Landing Corrections

✔ Truncated Domes Installation

✔ Walkway Repairs

✔ ADA Walkway Striping

✔ Documentation for Legal Protection

✔ Annual Maintenance Schedule

Our crews are trained specifically for ADA + CBC compliance.


6. Get a Free Path of Travel Inspection (California Properties)

We offer a free, quick Path of Travel assessment for:

  • retail centers

  • industrial parks

  • HOAs

  • multifamily

  • medical offices

  • commercial buildings

Includes:

  • 10-minute walkthrough

  • photos

  • list of violations

  • risk-level breakdown

  • recommended fixes

👉 Message us or visit welovepaving.com to schedule your free ADA route assessment.

The 2026 ADA Maintenance Guide for Property Managers (What Every PM Should Know Before It’s Too Late)

Introduction: ADA Is Not Optional — And It’s Not One-Time

Most property managers still see ADA as a “one-and-done” project.
Paint it. Install the sign. Done.

Wrong.

ADA + California Building Code (CBC) require ongoing maintenance, and in 2026 the enforcement environment is more aggressive than ever:

  • Lawyers target small visual violations

  • Tenants document issues

  • Slopes shift as pavement settles

  • Paint fades within 12–18 months

The result?
$4,000–$12,000 per violation plus attorney fees — even for issues that started as simple maintenance.

This guide explains exactly what PMs need to inspect, fix, and document to stay protected.


1. Understanding ADA in Parking Lots (The Basics Done Right)

Your parking lot must include:

  • Correct number of ADA stalls (based on total spaces)

  • Proper distribution (van-accessible requirements)

  • Access aisle with correct dimensions

  • International symbol of accessibility marked clearly

  • Signage at correct height (60″ min. to bottom)

  • Correct slope (≤ 2% in any direction)

  • Accessible Path of Travel from parking → entrance

Even if these were correct years ago, your lot may no longer meet the standard due to:

  • Pavement movement

  • Weather erosion

  • Traffic wear

  • Fading paint

  • Broken concrete

ADA compliance expires if maintenance does.


2. The 7 Most Common ADA Violations in 2026

(These are exactly what lawyers look for first.)

1. Faded Blue Striping or Access Aisles

If inspectors can’t easily see the blue, it’s considered non-compliant.
Most fading happens in 12–18 months.

2. Pooling Water or Incorrect Slopes

Standing water or pavement settling creates slopes > 2%.
This alone triggers a violation.

3. Missing, Low, or Incorrect Signage

Most common errors:

  • No van-accessible plaque

  • Wrong mounting height

  • Sign not visible from drive lane

  • Missing “Minimum Fine $250” sign (CBC requirement)

4. Damaged or Non-Compliant Ramps

Signs your ramp fails:

  • Too steep

  • No landing

  • Cracked concrete

  • Improper transitions

  • Uneven edges

5. Path of Travel Trip Hazards

Any uplift > ¼” is a trip hazard under ADA.

6. Incorrect Stall Dimensions

ADA stall width + aisle must meet CBC sizes (California is stricter).

7. Missing or Outdated Markings

Crosshatch, arrows, curb painting, directional cues — all must be clear and consistent.


3. Why ADA Lawsuits Start in the Parking Lot

Because it’s low-hanging fruit for lawyers.

Documenting violations requires only:

  • a level

  • a tape measure

  • a smartphone

And each violation quickly becomes:

  • $4,000 minimum statutory penalty

  • Attorney fees

  • Repair orders

  • Possible tenant complaints

  • Insurance involvement

Most lawsuits we see at WLP start from one of these three issues:

  1. Faded striping

  2. Incorrect slope

  3. Trip hazard on path of travel


4. The Annual ADA Maintenance Checklist for 2026

This es oro para PMs. Claro, directo, checklist listísimo para PDF.

Every 12 Months, Inspect:

  • ADA stalls (fading, chipping, discoloration)

  • Access aisle striping

  • Blue curb visibility

  • Signage height & placement

  • Ramp slope, landing, cracks

  • Trip hazards (concrete or asphalt displacement)

  • Path of travel continuity

  • Loading/unloading zones

  • Curb paint visibility

  • Directional arrows & markings

Every 18–24 Months, Perform:

  • Sealcoat (protects visibility + longevity)

  • Crackfilling (prevents water intrusion)

  • ADA restriping

  • Curb repainting

  • Minor concrete grinding or patching


5. How Top Property Managers Stay ADA-Safe All Year

Step 1 — Get a Professional ADA Audit

A contractor trained in CBC + ADA reviews:

  • slopes

  • stall dimensions

  • signage

  • surface condition

  • transitions

  • path of travel

And gives you a risk-level report.

Step 2 — Prioritize High-Risk Violations

Fix these ASAP:

  • Slope issues

  • Trip hazards

  • Missing signage

  • Damaged ramps

These create lawsuits the fastest.

Step 3 — Repaint & Restripe Proactively

Don’t wait for fading.
Do it every 12–18 months.

Step 4 — Document Everything

Photos
Invoices
Maintenance logs

This protects PMs against claims:
“We maintain compliance regularly.”

Step 5 — Partner With an ADA-Focused Paving Company

General paving contractors ≠ ADA specialists.
ADA is technical, measured, documented.

WLP crews handle this daily.


6. How We Love Paving Helps You Stay ADA-Compliant

At WLP, we offer a dedicated program for Property Managers:

The ADA Protection Program

  • Full ADA + CBC audit

  • Photo report with priorities

  • Turnkey repairs (asphalt, concrete, ramps, markings, signs)

  • Annual maintenance schedule

  • Documentation for legal protection

  • Fast execution with minimal tenant disruption

We handle everything—start to finish.


7. Ready for 2026 ADA Compliance? (Free Quick Assessment)

If you manage a property in California, you can schedule a Free Quick ADA Assessment:

  • 10-minute walk-through

  • Identify immediate violations

  • Clear next steps

  • No obligation

👉 Message us or visit welovepaving.com to secure your ADA check.

Your property stays protected.
Your tenants stay safe.
Your budget stays intact.


ADA Lawsuits in California: How to Avoid Being a Target in 2026

Introduction

California is the #1 state in the country for ADA lawsuits, and the numbers keep rising every year.

Looking for a full breakdown of how to prevent ADA lawsuits in 2026?


Check out the 2026 ADA Compliance Checklist by StopADALawsuits, where you can review the latest California requirements and run a free risk assessment.

Why?
Because ADA compliance is strict, technical, and heavily enforced—and plaintiffs know that most properties have hidden violations.

In 2026, the easiest way to avoid lawsuits is simple:

Fix the violations before someone else finds them.

This guide explains the most common ADA issues we see in parking lots and what Property Managers must do to stay compliant and reduce risk.


1. Why ADA Lawsuits Are So Common in California

There are three main reasons:

1) California has stricter enforcement than other states

The state follows both ADA + CBC (California Building Code), making requirements more detailed.

2) Most violations are invisible to the untrained eye

The difference between compliant and non-compliant can be a few inches or a slope of 0.5%.

3) Serial plaintiffs are constantly scanning properties

Professional plaintiffs visit dozens of lots every week looking for easy wins.

A single incorrect slope or missing sign can trigger a $4,000–$15,000 lawsuit.


2. The 7 Most Common ADA Parking Lot Violations in 2026

If your property has any of these, you’re at risk:

1) Slopes over 2% in accessible stalls

The #1 cause of lawsuits.
PMs think it’s “flat,” but inspectors measure with digital levels.

2) Improper access aisles

Wrong width, wrong striping, wrong slope, missing cross-hatching.

3) Incorrect signage height or missing signs

Simple and extremely common.

4) Incorrect layout or dimensions

Stalls and aisles must follow strict measurements.

5) Missing or improper truncated domes

Placement, color, and spacing matter.

6) Incorrect path of travel

Obstructions, elevation changes, steep areas, or disruptions in the accessible route.

7) Faded or confusing striping

If it’s unclear → it’s a violation.

Most ADA violations have nothing to do with the building —
they’re in the parking lot.


3. Why ADA Violations Cost So Much (Even If They’re Small)

Because California law adds:

  • Statutory damages

  • Attorney fees

  • Cost of remediation

  • Penalties for non-compliance

This means:

A $300 fix can easily become a $10,000+ lawsuit.

Most PMs don’t realize:
You don’t need a customer complaint to be sued.
A plaintiff only needs to see the violation.


4. How to Avoid Being a Target in 2026: The Prevention Plan

Here’s how smart Property Managers protect themselves.


Step 1: Get a Professional ADA Site Assessment

A proper ADA assessment includes:

  • Slope measurements (digital)

  • Signage review

  • Layout verification

  • Truncated dome inspection

  • Path of travel analysis

  • Striping + marking inspection

  • CBC + ADA comparison

A walk-through is not enough —
you need measurements, photos, and a corrective plan.


Step 2: Fix High-Risk Violations First

The highest-risk violations are:

  • Slopes > 2%

  • Missing signage

  • Incorrect wheelchair symbol

  • Bad access aisles

  • Incorrect curb ramp design

  • No truncated domes

These are the “easy wins” for serial plaintiffs.


Step 3: Update Striping & Signage to 2026 Standards

Fresh striping + correct signage dramatically reduces risk.

It also shows inspectors your site is actively maintained.


Step 4: Repair or Replace Non-Compliant Ramps

Many ramps built years ago no longer meet 2026 standards.

A quick evaluation determines whether:

  • Grinding

  • Regrading

  • Replacement

  • Or reconfiguring access aisles

is required.


Step 5: Maintain Documentation

If you ever get questioned, documentation is your protection.

Keep:

  • Photos “before” and “after”

  • Plan of action

  • Contractor scope

  • Dates of maintenance

  • Slopes and measurements

Paperwork can stop a claim before it becomes a lawsuit.


5. The Cost of Prevention vs. The Cost of a Lawsuit

This is why PMs trust WLP:

Cost of ADA corrections:

$1,500–$8,000 on average (depending on scope)

Cost of an ADA lawsuit:

$10,000–$40,000+
Per incident.

Prevention is always cheaper than litigation.


Conclusion: ADA Compliance Is Not Optional in 2026

ADA enforcement is rising, plaintiffs are more active, and California standards are stricter than ever.

But the good news is:

Most violations are easy to fix —
if you identify them early and work with a qualified contractor.


The $100,000 Mistake: Why Most GC Projects Fail Before Asphalt Even Starts (And How We Fix It)

Most GCs think asphalt problems start the day paving begins.

They don’t.

They start weeks or months earlier, quietly stacking up unnoticed issues from other trades—issues that explode right when the schedule is tightest, budgets are stressed, and owners want the job turned over.

And here’s the real cost:

One overlooked mistake before paving can cost a GC $50K–$100K in rework, delays, and emergency mobilizations.

This is the blog that explains why it happens… and how elite GCs prevent it.


1. The $100K mistake is NOT bad paving. It’s bad preparation.

Most “paving failures” aren’t caused by asphalt crews.

They’re caused by:

  • incorrect grade left by concrete

  • trench backfills not compacted by utilities

  • uneven base from demo crews

  • ADA slopes that don’t match plans

  • unaligned forms

  • subs working without coordination

  • unfinished drainage corrections

By the time the asphalt sub shows up, the job is already compromised.

Think of us as the last trade standing on top of everyone’s mistakes.

That’s the real $100K mistake.


2. How a project spirals BEFORE paving even begins

Here’s the silent chain reaction GCs rarely see until it’s too late:

Wrong grade left by concrete →

Asphalt thickness off → trip hazards → ADA fails → entire section must be torn out.

Cost: $25K–$40K.

Utility trenches poorly compacted →

Asphalt sinks → water ponds → owner complains → rework.

Cost: $15K–$30K.

Lines, forms, or layout off by 1–2 inches →

Cross-slopes become noncompliant.

Cost: $10K–$50K under inspection.

Drainage not corrected before paving →

Water flow wrong → puddles → premature failure.

Cost: $20K–$60K in accelerated deterioration.

This is how a “simple paving day” becomes a budget massacre.


3. Why GCs underestimate this problem

GCs assume subs will “adjust on site.”

Most asphalt crews can’t.
And the cheap ones won’t.

Surface prep, fine grading, and ADA corrections require:

  • laser-level accuracy

  • trained crews

  • heavy equipment

  • calibration knowledge

  • slope math

  • accountability

You can’t “wing” a compliant slope.
You can’t “fix” bad compaction with asphalt.
You can’t “adjust” a failed grade with a rake.

But subs with low bids pretend you can.


4. The WLP Difference: We audit the job BEFORE the job

This is where WLP flips the script completely.

Most asphalt subs show up on paving day.

We don’t.

WLP Step #1 — Pre-Paving Inspection (On Our Dime)

We walk the entire site days before mobilizing.

We check:

  • grades

  • cross-slopes

  • ADA ramps

  • drain flow

  • utility trench compaction

  • concrete transitions

  • high/low points

  • base uniformity

  • impact of other trades

This is where we catch the disasters before they cost $100K.

WLP Step #2 — Risk Report with Photos

We don’t just point out problems.
We send a clean, structured report your PM can hand to ownership or architects.

WLP Step #3 — Corrections Before Mobilization

We fix what other trades left behind:

  • regrading

  • milling high spots

  • filling low areas

  • compacting trenches

  • ADA slope corrections

  • drainage adjustments

This saves GCs from:

  • punch list nightmares

  • ADA lawsuits

  • failed inspections

  • angry owners

  • emergency rework

  • scheduling chaos

This is why elite GCs love us.


5. The math doesn’t lie — this is why we save GCs money

Before WLP process:
GC saves $5K hiring cheap sub →
Project fails →
Rework $40K–$100K →
Owner angry →
Delay penalties →
Profit gone.

After WLP process:
GC invests in the right sub →
Zero rework →
Zero ADA issues →
Zero emergency mobilization →
Owner happy →
Project delivered smoothly.

It’s not magic.
It’s discipline + process + accountability.


6. The harsh truth: cheap asphalt subs are the most expensive mistakes a GC can make

If your sub:

  • doesn’t walk the site before

  • doesn’t talk slopes

  • doesn’t check grades

  • doesn’t understand ADA

  • doesn’t ask about drainage

  • doesn’t document anything

…they’re not a partner. They’re a liability.

In 2026, with tighter inspection standards in California, a bad asphalt sub can destroy the entire project’s profitability.


7. How to avoid the $100K mistake (GC checklist)

Before awarding an asphalt scope, ask the sub:

✔️ Do you inspect the job before mobilizing?
✔️ Do you correct grades left by other trades?
✔️ Do you verify ADA?
✔️ Will you send a pre-paving report?
✔️ Can you handle drainage corrections?
✔️ Do you do multi-phase paving?
✔️ Do you have dedicated QC for paving day?

If any answer is “no,” the GC should walk away.


8. Final Word: Your asphalt sub can make or break your project

The $100K mistake isn’t optional.
It happens automatically when no one checks the site before paving.

The GCs who protect their budgets in 2026 are the ones who:

  • demand pre-paving inspections

  • only work with ADA-literate subs

  • choose predictable partners

  • eliminate rework before it happens

WLP was built for exactly this.


CTA (Premium & Direct for GCs)

If you’re a GC who wants zero rework, zero ADA surprises, and perfect paving days—
WLP can inspect your site before you mobilize a single truck.

👉 Request your Pre-Paving Risk Assessment (2026)
(We’ll tell you what every other sub missed.)

The 2026 Asphalt Maintenance Playbook for Property Managers

Asphalt isn’t just “part of the property.”
It’s an asset — one that quietly loses value each year you ignore it.

In 2026, with rising material costs, stricter ADA enforcement, and heavier parking lot usage, property managers can’t afford to treat asphalt maintenance reactively. The smartest operators use a proactive, system-based playbook to protect their investment and avoid expensive surprises.

This guide breaks down exactly how to manage your asphalt the way top-tier PMs do.


1. Know Your Pavement’s Life Cycle (2026 Reality Check)

Asphalt isn’t permanent — but its lifespan depends almost entirely on maintenance.
Here’s the 2026 lifecycle you should expect:

  • 0–3 years: Perfect condition, no cracks

  • 3–5 years: Light oxidation begins

  • 5–7 years: First cracks appear (critical window for crackfilling)

  • 7–10 years: Structural wear increases, sealcoat needed

  • 10+ years: Accelerated deterioration → patching, resurfacing, or replacement

2026 inflation note:
A crack today might cost $1–$3 to seal.
Ignore it, and it becomes a $40–$80 patch — then a $15,000+ resurfacing zone.


2. The 2026 Budget Equation: Spend a Little Now or a Lot Later

Smart property managers follow this rule:

1–3% of the replacement cost per year keeps your pavement healthy for 25+ years.

Replace a full lot in California?
That’s $120k–$450k depending on size.

Meaning:
Budgeting $2k–$8k annually is the difference between longevity and disaster.

In 2026, with rising crude oil prices and labor costs, this equation matters more than ever.


3. The Three-Tier Maintenance Strategy (2026 Update)

Every PM needs a plan that includes all three tiers below:


Tier 1 — Preventive Maintenance (Your Highest ROI)

  • Crackfilling

  • Sealcoating (every 3–5 years)

  • Minor patching

  • Drainage corrections

Why it matters in 2026:
Preventive work is still the cheapest way to extend pavement life. Costs in California are predicted to rise another 8–12%, so early action saves thousands.


Tier 2 — Corrective Maintenance

When the damage is visible:

  • Alligator cracking

  • Rutting or sinking

  • Potholes

  • Base failures

This requires:

  • Infrared patching

  • Remove & replace

  • Milling & overlay

Cost note 2026:
Corrective repairs are 3–5x more expensive than preventive fixes.


Tier 3 — Capital Improvements

For lots past their lifespan:

  • Full-depth replacement

  • Full resurfacing

  • Lot regrade for drainage

  • New striping layout

Plan this on a 12–15 year horizon.


4. 2026 Inspection Checklist (What PMs Must Record)

A tech-forward contractor will walk your property with a checklist like this:

Structural

  • Alligator cracks

  • Longitudinal / transverse cracks

  • Potholes

  • Base sinking

  • Rutting

Surface

  • Oxidation

  • Raveling

  • Faded striping

  • Sealcoat condition

Drainage

  • Standing water

  • Clogged drains

  • Flow direction issues

ADA Compliance

  • Ramp slope accuracy

  • Parking stall dimensions

  • Cross-slopes

  • Signage

  • Detectable warning placement

If your contractor doesn’t document ADA issues → huge red flag.


5. The 2026 Contractor Evaluation Checklist

Not all contractors are created equal.
Here’s how PMs avoid liabilities:

Ask for:

✔️ Mix type they’ll use (should NOT be generic)
✔️ Their surface prep process
✔️ Photos of similar projects
✔️ Warranty info
✔️ ADA experience
✔️ Traffic control plan

Avoid contractors who:

❌ Don’t specify mix type
❌ Don’t clean or prep the surface
❌ Offer suspiciously low prices
❌ Don’t bring a real crew
❌ Avoid talking about ADA

Cheap work in 2026 is even riskier — costs are up, and contractors cutting corners are everywhere.


6. Planning Maintenance Without Disrupting Tenants

The best PMs follow this workflow:

1. Pre-notice tenants 48–72 hours before
2. Use multi-phase closures (keep 50–70% of the lot open)
3. Require clear signage from contractor
4. Work weekend or overnight (depends on lot size)
5. Get a post-job report with photos

Nothing builds credibility with tenants like a smooth project.


7. Sample 2026 Annual Maintenance Plan

Here’s an example for a medium-sized commercial property:

Q1: Inspection + crackfilling
Q2: Sealcoating + striping
Q3: Infrared repair in high-traffic zones
Q4: Drainage correction + ADA touch-ups

Repeat every year and your lot easily hits 20+ years of life.


8. The Bottom Line (2026)

Property managers who follow a structured, proactive maintenance plan:

  • Spend less over 10 years

  • Avoid ADA lawsuits

  • Keep tenants safe

  • Extend pavement life

  • Get predictable budgets

  • Present better reports to owners

And most importantly…

They never get blindsided by a $40k–$250k replacement bill.

Your content goes here. Edit or remove this text inline or in the module Content settings. You can also style every aspect of this content in the module Design settings and even apply custom CSS to this text in the module Advanced settings.

Asphalt Maintenance: What It Is, How It Works, and What It Really Costs in 2026

Keeping your parking lot in good shape isn’t optional—it’s one of the smartest financial decisions a property owner or manager can make. Asphalt deteriorates quietly at first and then all at once. The difference between a well-maintained lot and a neglected one can be tens of thousands of dollars in avoidable repairs.

In 2026, with extreme weather, heavier traffic loads, and rising material prices, asphalt maintenance has never been more important.

This guide breaks down what asphalt maintenance is, how it works, and what you should realistically expect to spend this year.

What Is Asphalt Maintenance?

Asphalt maintenance refers to all the preventive and corrective actions used to protect a pavement surface, slow down deterioration, and extend its useful life.

In simple terms:
Maintenance keeps your parking lot from turning into expensive repairs.

Typical asphalt maintenance includes:

  • Sealcoating

  • Crack filling

  • Patching small problem areas

  • Pothole repair

  • Striping and pavement markings

  • Drainage improvements

  • Regular inspections & cleaning

These services protect the asphalt from water intrusion, UV oxidation, oil spills, and daily wear.


Why Asphalt Maintenance Matters for Property Managers

1. It Extends the Life of Your Parking Lot

A well-maintained asphalt surface can last 20–30 years.
A neglected lot? Sometimes less than 10.

2. It Lowers Long-Term Costs

Ignoring small problems leads to major damage:

  • Small crack → water intrusion → base failure → potholes → full-depth repair.
    The difference: $0.30/ft vs. $8–$12/ft.

3. It Improves Curb Appeal & Tenant Satisfaction

Your parking lot is the first impression of your property. Clean, freshly striped lots increase perceived safety and cleanliness.

4. It Reduces Liability

Well-marked, defect-free pavement reduces:

  • Trip hazards

  • Tire damage claims

  • ADA liabilities

5. It Protects Your Investment

Your parking lot is often a six-figure asset. Preventive maintenance preserves that value.


How Asphalt Maintenance Works (Step-by-Step)

1. Inspection & Assessment

A contractor evaluates:

  • Pavement age

  • Cracking patterns

  • Drainage issues

  • Oxidation level

  • Base stability

  • Traffic flow

  • ADA compliance

This determines the right maintenance plan.


2. Cleaning & Surface Preparation

Before any service is applied, the pavement must be:

  • Cleaned

  • Blown out

  • Power washed (if needed)

  • Cleared of oil spots

  • Pre-treated for stains

The better the prep, the longer the maintenance lasts.


3. Crack Filling

Cracks are routed (optional), cleaned, and filled with hot rubberized material to prevent water from entering the base.

Cost: $0.30–$0.60 per linear foot


4. Patching or Pothole Repair

Small damaged areas are cut out and replaced with new hot mix asphalt.

Cost:

  • Skin patch: $3–$5 per sq ft

  • Cut & replace: $6–$12 per sq ft


5. Sealcoating

Sealcoat protects the asphalt from UV damage, weather, and oil penetration while restoring the black finish.

Cost: $0.18–$0.35 per sq ft


6. Striping & Markings

After sealing, pavement markings are re-applied:

  • Parking lines

  • Handicap stalls

  • Arrows

  • Fire lanes

  • No-parking zones

Cost: $0.12–$0.25 per linear foot (or per-stall pricing)


7. Ongoing Preventive Care

To maximize the life of the lot:

  • Seal every 2–3 years

  • Crack fill twice a year

  • Perform semiannual inspections

  • Repair small problems before they spread

What Asphalt Maintenance Really Costs in 2026

Exact pricing depends on location, layout, square footage, and pavement condition, but these are the typical ranges across the U.S.

🔹 Sealcoating:

$0.18–$0.35 per sq ft

🔹 Crack Filling:

$0.30–$0.60 per linear ft

🔹 Asphalt Patching:

  • Skin patch: $3–$5 per sq ft

  • Cut & replace: $6–$12 per sq ft

🔹 Pothole Repair:

$250–$650 per pothole depending on depth and size

🔹 Line Striping:

$0.12–$0.25 per linear ft
or $35–$50 per parking stall

🔹 ADA Markings & Signage:

$250–$900 per stall

Average Preventive Maintenance Budget (Annual):

$3,000–$25,000 depending on property size

Cost of Doing Nothing:

A neglected parking lot often needs:

  • Base repairs

  • Milling

  • Full-depth reclamation

  • Total resurfacing

Full replacement costs: $4–$8 per sq ft ($200,000+ for many lots).

Maintenance usually saves 60–80% vs. replacement.


How Often Should You Maintain Asphalt?

A good schedule:

Service Frequency
Crack Seal Every 6–12 months
Sealcoat Every 2–3 years
Striping Every 1–2 years
Inspections Twice per year
Patching As needed

This keeps asphalt at its peak performance.


Signs Your Parking Lot Needs Maintenance NOW

  • Multiple cracks forming a “spiderweb” pattern

  • Faded surface or gray color

  • Standing water after rain

  • Oil stains

  • Potholes or soft spots

  • Faded or missing striping

  • Uneven surfaces

  • Trip hazards

If you see 2+ of these, it’s overdue.


Final Thoughts

Asphalt maintenance is not just a cosmetic upgrade—it’s a financial strategy. The right maintenance plan protects your property, reduces liability, and dramatically lowers long-term costs.

When done consistently, asphalt maintenance is the difference between:

✔ A 20–30-year pavement lifespan
vs.
✘ A 7–10-year premature failure


Get a Free Parking Lot Assessment

If you want a cost breakdown, lifespan estimate, or maintenance plan for your property, request a free assessment:

👉 We’ll inspect your lot, identify risks, and provide a clear maintenance roadmap.

How Much Does a Blacktop Driveway Cost in 2025? (Complete Pricing Guide)

If you’re planning to resurface or install a new blacktop driveway in 2025, understanding the real costs can help you budget smart. Prices vary based on materials, thickness, location, and labor — but we’ve broken down everything you need to know in this updated cost guide.


💲 Average Blacktop Driveway Cost in 2025

The average cost to install a blacktop driveway in 2025 ranges between $4 and $8 per square foot, including materials and labor.

  • Basic residential driveway (2″ thick) → $3,000–$5,000 total

  • Mid-grade (3″ thick) → $5,000–$8,000

  • Commercial-grade or reinforced → $8,000–$15,000+

Pro tip: Driveways with poor base preparation or thin asphalt layers may crack within a few years, costing more in repairs than building it right the first time.


⚒️ Cost Breakdown

Factor Typical Range Notes
Base preparation $1.50–$3.00/sq.ft Crucial for durability
Hot mix asphalt $2.00–$4.00/sq.ft Material + delivery
Labor $1.00–$2.50/sq.ft Depends on access & slope
Sealcoating $0.25–$0.50/sq.ft Recommended every 2–3 years

🧱 What Affects the Cost of a Blacktop Driveway

Several factors influence your final price:

  1. Driveway size & layout – curves, turns, and slopes increase cost.

  2. Soil condition & drainage – poor subgrade requires more base material.

  3. Asphalt thickness – thicker layers last longer but cost more upfront.

  4. Sealcoating & maintenance – protects the surface from oxidation and weather damage.

  5. Local labor rates – prices vary between regions in California and across the U.S.


🔧 Blacktop vs. Asphalt — What’s the Difference?

Technically, blacktop is a type of asphalt, but blacktop has a higher stone content, making it shinier and slightly more flexible. Both materials are durable, but asphalt driveways are more common for commercial projects, while blacktop is ideal for residential use.


🧍‍♂️ How to Save Money on Your Driveway Project

  • Get multiple estimates from licensed paving contractors.

  • Ask about recycled asphalt for the base layer.

  • Schedule paving during off-season months (late fall or early spring).

  • Maintain your surface with sealcoating every 2–3 years to avoid costly replacements.


📅 Maintenance and Longevity

A properly installed blacktop driveway can last 15–20 years with minimal cracking if sealed and cleaned regularly.
Sealcoating helps restore color, reduce oxidation, and prevent water penetration.


FAQs

Q1: How much does a blacktop driveway cost per square foot in 2025?
Most homeowners pay between $4–$8 per sq.ft., depending on location, base prep, and asphalt thickness.

Q2: How often should I seal my blacktop driveway?
Every 2–3 years is ideal to extend lifespan and protect against oxidation.

Q3: Is blacktop cheaper than concrete?
Yes — on average, blacktop costs 30–50% less than concrete per square foot and is easier to repair.


🏁 Final Thoughts

Installing a blacktop driveway is a long-term investment in your property’s appearance and functionality.
At We Love Paving, our team helps homeowners and commercial clients build driveways that last — with proper grading, drainage, and finishing that meet California standards.

Different Types of Asphalt Patching (and When to Use Each)

When it comes to asphalt repair, not all patching methods are created equal. Each technique serves a specific purpose depending on the extent of damage, budget, and weather conditions. Understanding which type to use can make the difference between a short-term fix and a long-lasting surface.


1️⃣ Throw-and-Go (Temporary Patch)

Best for: Emergency or short-term fixes.
Typical use: Cold weather or when immediate repair is needed.

This is the quickest and simplest method — workers shovel cold mix asphalt into the pothole and compact it with a truck tire or tamper. While it restores drivability fast, it’s not durable and should be replaced with a permanent repair once weather improves.


2️⃣ Semi-Permanent Patch

Best for: Moderate damage and cost-effective durability.
Typical use: Residential roads, parking lots, or moderate traffic areas.

This method involves cleaning the pothole, squaring the edges, and filling it with hot or cold mix asphalt. The surface is compacted thoroughly, ensuring better adhesion and a longer lifespan than throw-and-go repairs.


3️⃣ Full-Depth Patching (Permanent Repair)

Best for: Severe structural damage or base failure.
Typical use: High-traffic areas, heavy-duty commercial parking lots, or industrial driveways.

This is the most durable patching method. The damaged asphalt and base material are completely removed, the base is rebuilt, and new hot mix asphalt is installed in layers. Full-depth patching restores structural integrity and prevents water infiltration.


4️⃣ Infrared Asphalt Patching

Best for: Surface-level defects and seamless aesthetic finish.
Typical use: High-visibility areas (entrances, retail centers, or HOA streets).

Infrared technology heats the damaged area until it softens, then new asphalt is blended into the existing surface. The result is a smooth, seamless patch that’s virtually invisible and prevents new cracks from forming at the edges.


5️⃣ Spray Injection Patching

Best for: Preventive maintenance and low-cost rural repairs.
Typical use: County roads, utility cuts, or long crack lines.

This method uses specialized equipment to blow debris out of the hole, spray a tack coat, and inject asphalt and aggregate mixture under pressure. It’s fast, efficient, and ideal for crews covering large areas.


⚙️ How to Choose the Right Asphalt Patching Method

  • For quick fixes: Throw-and-Go

  • For small but clean repairs: Semi-Permanent

  • For long-term durability: Full-Depth

  • For clean, aesthetic finishes: Infrared

  • For wide-area maintenance: Spray Injection


💡 Pro Tip from We Love Paving

Before patching, always inspect the base layer. Surface fixes won’t last if the foundation is unstable. At We Love Paving, our experts analyze the root cause of pavement failure and select the most effective repair for each situation — ensuring you save time and money in the long run.


Need help choosing the right repair method for your property?
📞 Contact We Love Paving today for a free assessment and quote.