
Maintaining a safe and organized parking lot is essential for businesses, schools, and other establishments. One of the key components of this maintenance is parking lot striping. Properly striping a parking lot not only enhances its appearance but also ensures safety and compliance with regulations. In this guide, we’ll delve into the essential steps involved in parking lot striping and offer tips for achieving optimal results.
Clean the Surface
Before embarking on the striping process, it’s crucial to prepare the surface of the parking lot. Dirt, debris, and oil stains can hinder the adhesion of the paint, leading to premature deterioration of the markings. To clean the surface effectively, consider using a pressure washer to remove stubborn grime or manually sweeping and scrubbing the area. This preparatory step sets the foundation for a successful striping job.
Plan the Layout
The next step is to meticulously plan the layout of the parking lot. Consider factors such as the number and size of parking spaces, the placement of handicapped spots, crosswalks, loading zones, and directional arrows. A well-thought-out layout maximizes parking capacity while ensuring smooth traffic flow and compliance with accessibility standards. Utilizing software or professional consultation can aid in creating an optimal layout tailored to your specific needs.
Measure and Mark the Layout
With the layout plan in hand, it’s time to transfer it onto the surface of the parking lot. Using measuring tape, chalk, or other marking tools, carefully delineate the boundaries of parking spaces, aisles, and other designated areas. Precision is key during this step to avoid discrepancies that could cause confusion or congestion among drivers. Take into account factors such as parking space dimensions, aisle widths, and clearance zones to maintain compliance with local regulations.
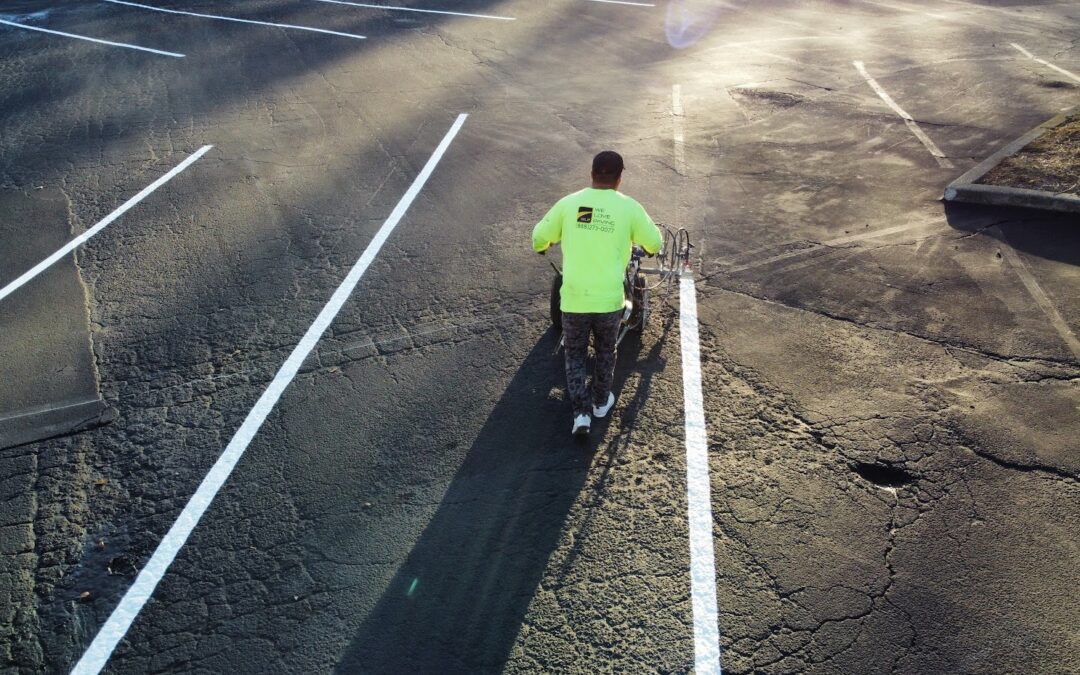
Select and Apply the Paint
Choosing the right type of paint is critical for the longevity and visibility of parking lot markings. Opt for high-quality traffic paint specifically formulated for use on asphalt or concrete surfaces. Consider factors such as durability, weather resistance, and drying time when selecting the paint. Depending on the size of the parking lot and available equipment, paint can be applied using a sprayer, roller, or brush. Ensure even coverage and sharp, well-defined lines to enhance visibility and aesthetics.
Allow the Paint to Dry
After applying the paint, exercise patience and allow sufficient time for it to dry completely. The drying process typically takes several hours, although it may vary depending on ambient temperature and humidity levels. Avoid prematurely opening the parking lot to vehicular traffic to prevent smudging or tracking of wet paint. Utilize cautionary signage or barricades to restrict access until the paint has fully cured and is ready for use.
Add Finishing Touches
Once the paint has dried, add any finishing touches to enhance visibility and safety. Consider incorporating reflective tape or thermoplastic markings for increased conspicuity, especially in low-light conditions. Install signage such as stop signs, pedestrian crossings, and speed limit indicators to reinforce traffic regulations and improve overall organization. Regular maintenance, including periodic repainting and touch-ups, ensures that parking lot markings remain clear and effective over time.
Conclusion
Parking lot striping is a fundamental aspect of maintaining a safe, orderly, and efficient parking environment. By following the outlined steps and adhering to regulatory standards, you can achieve professional-quality results that enhance both functionality and aesthetics. Whether you’re a business owner, property manager, or facilities maintenance professional, investing in proper striping ensures a positive experience for patrons and visitors alike. For complex projects or unfamiliar terrain, don’t hesitate to seek guidance from experienced professionals to ensure optimal outcomes.